Building the example
The example connection setup form looks like this:

To build the example connection setup form
Select Connection setup form from the left sidebar.
Select Connection setup.
Click
 to open the UI builder.
Drag and drop a Text element onto the UI builder canvas.
Configure the Text element properties.
- In the Text field, enter text to briefly describe what is necessary to configure the CyberApp.For the example, enter
Please provide credentials to your service account..
Drag and drop an Input element onto the UI builder canvas.
Configure the Input element properties.
- In the ID field, specify a unique alphanumeric name for the element.For example,
username. Set the Field type property to Identity.
In the Label field, enter
Username.
Drag and drop a Password element onto the UI builder canvas.
Configure the Password element properties.
- In the ID field, specify a unique alphanumeric name for the element.For example,
password. Set the Field type property to Secret.
Note
Password elements have the Field type property set to Secret by default.
In the Label field, enter
Password.
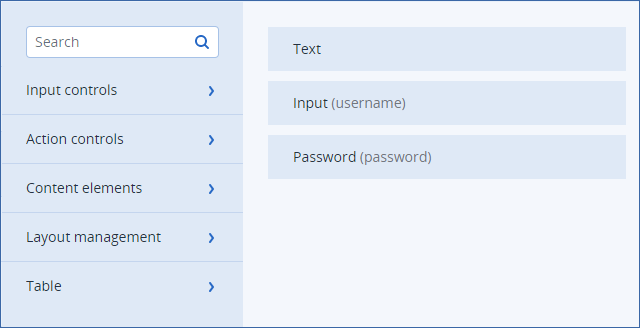
You should have the following structure in your UI builder:
[Optional] Click Preview to preview the changes.
Note
At this point, you will not see the form title or the Cancel and Connect buttons. These are added automatically when deployed.
Click Done.
Click Save changes.
Note
X-CyberApp-Auth header in the following format:<username>:{"password": "<password>"}<username> is the value of the Username field<password> is the value of the Password field