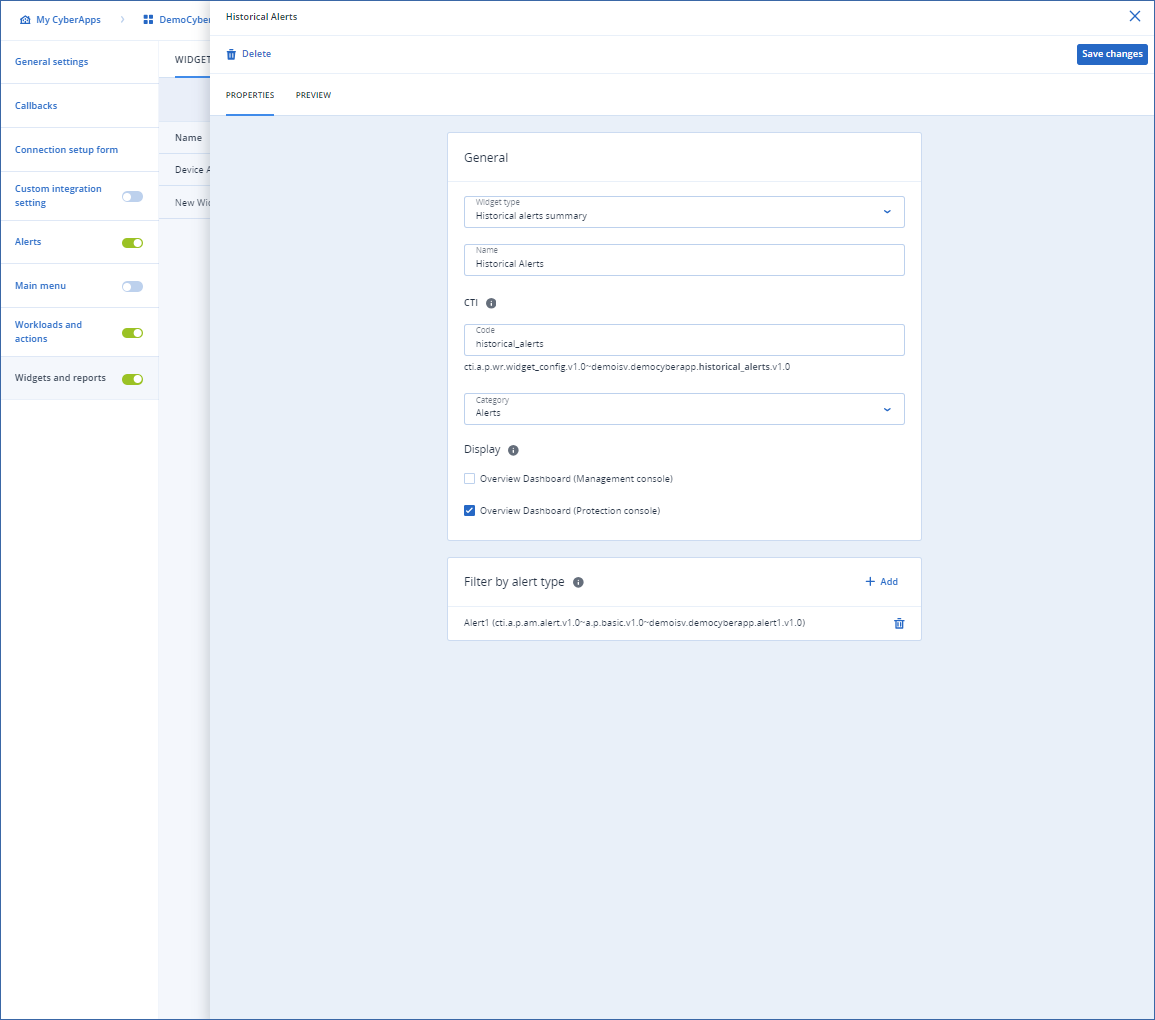
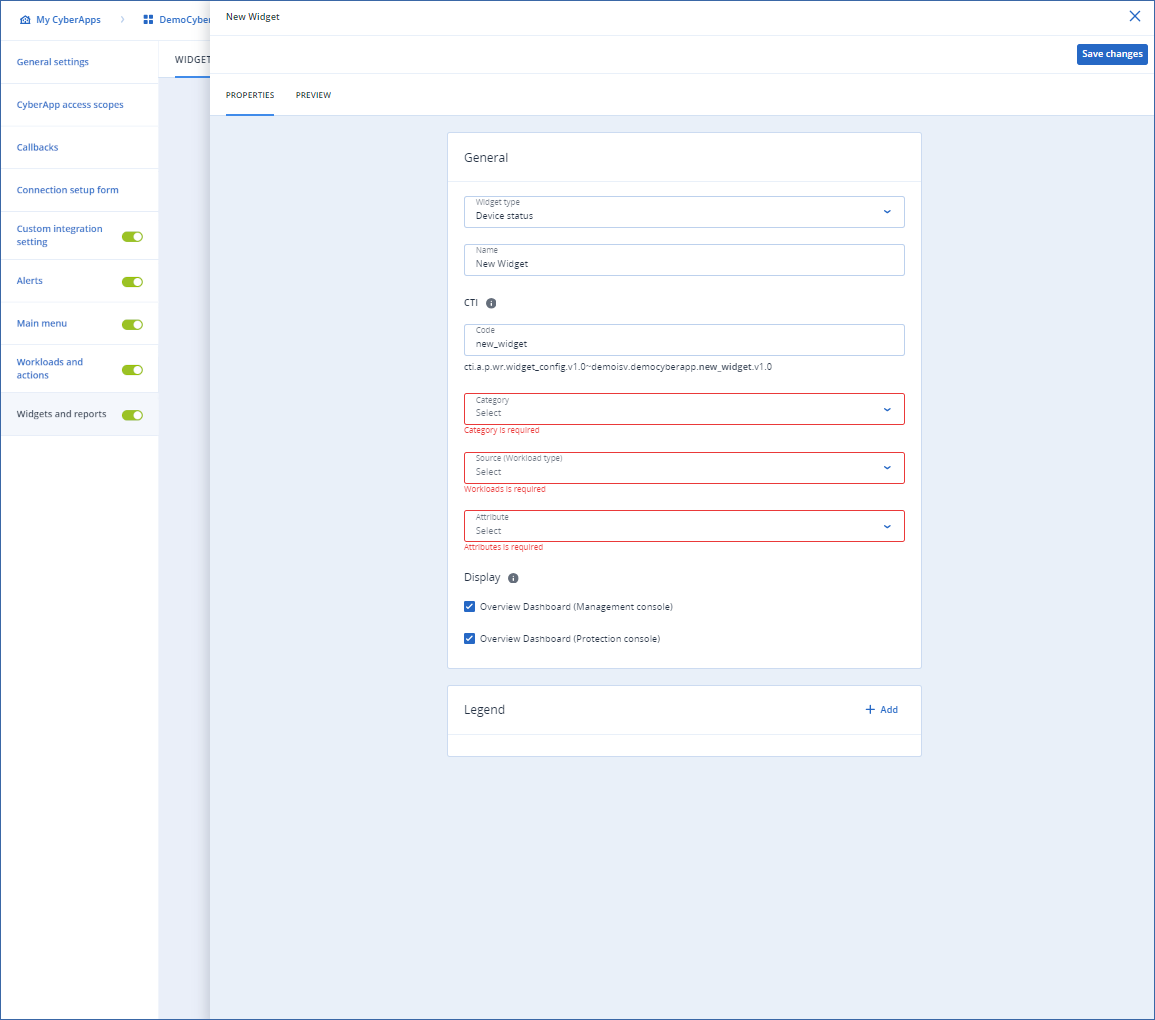
Creating an alerts widget
Note
To create an alerts widget, you must have created at least one alert.
To create an alerts widget
Select Widgets and reports from the left-hand menu.
[If required] Click Enable to enable the extension point.
Click Add widget.
- Select an alert widget type from the Widget type dropdown.The options are:
Historical alerts summary
Active alerts summary
Alerts history
Active alerts
Change the default Name for your widget.
Change the default Code for your widget.
Note
For more information on CTI codes, see CTI.
Select a category from the Category dropdown.
Select or clear the Display checkboxes to specify where the widget will be displayed by default.
Overview Dashboard (Management console)
Overview Dashboard (Protection console)
Note
By default, both are selected.
In Filter by alert type, add at least one alert as the source of information for the widget.
Click
 .
.Select an alert from the popup list.
Repeat for all the alerts you want to include in the widget.
To delete an alert, click
 .
.
Click Save changes.
Note
Click the PREVIEW tab to see how your widget will look.