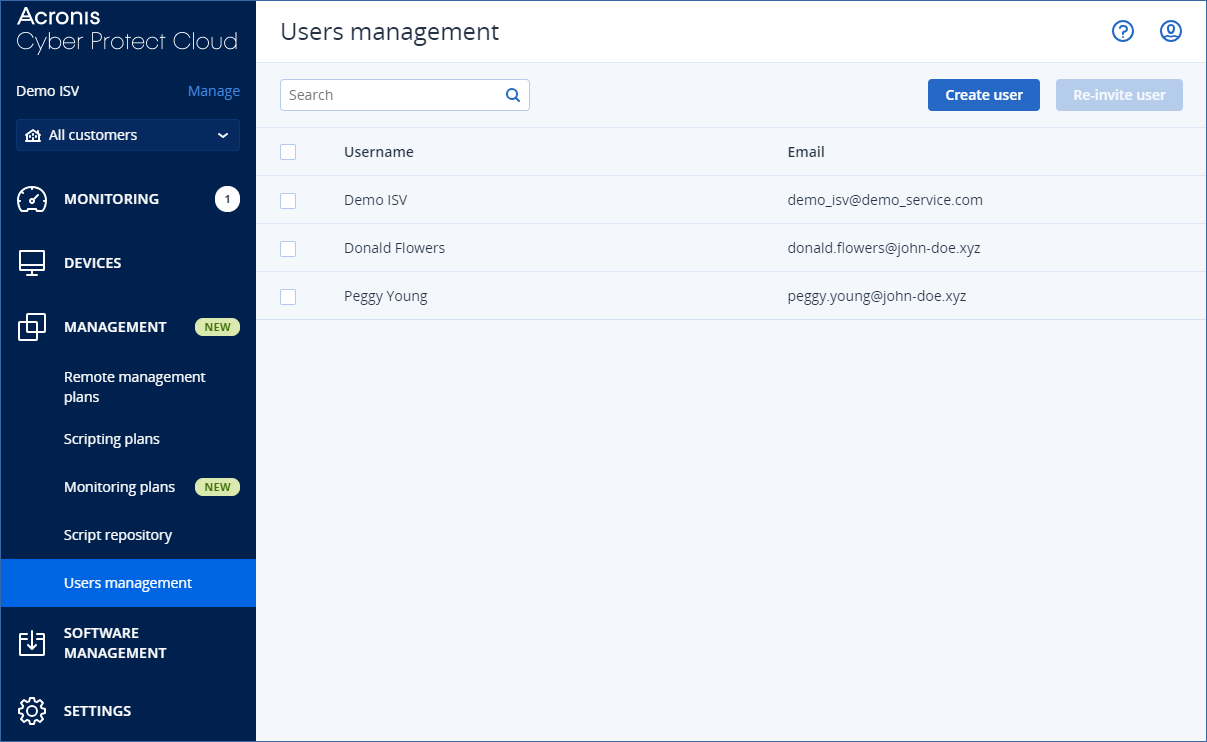
Example menu item
In this section, you will learn how to create a Users management menu item, and how to use Vendor Portal’s UI Builder to build a custom UI page.
You will learn how to:
Create a table.
Populate the table using data initializer callback.
Create a table action and attach a callback to it.
To build the custom UI page
- Click UI builder.The UI builder will open.
Note
For more information on the UI Builder, see UI Builder
In the right pane specify a Form name for the UI page.
To create the data table
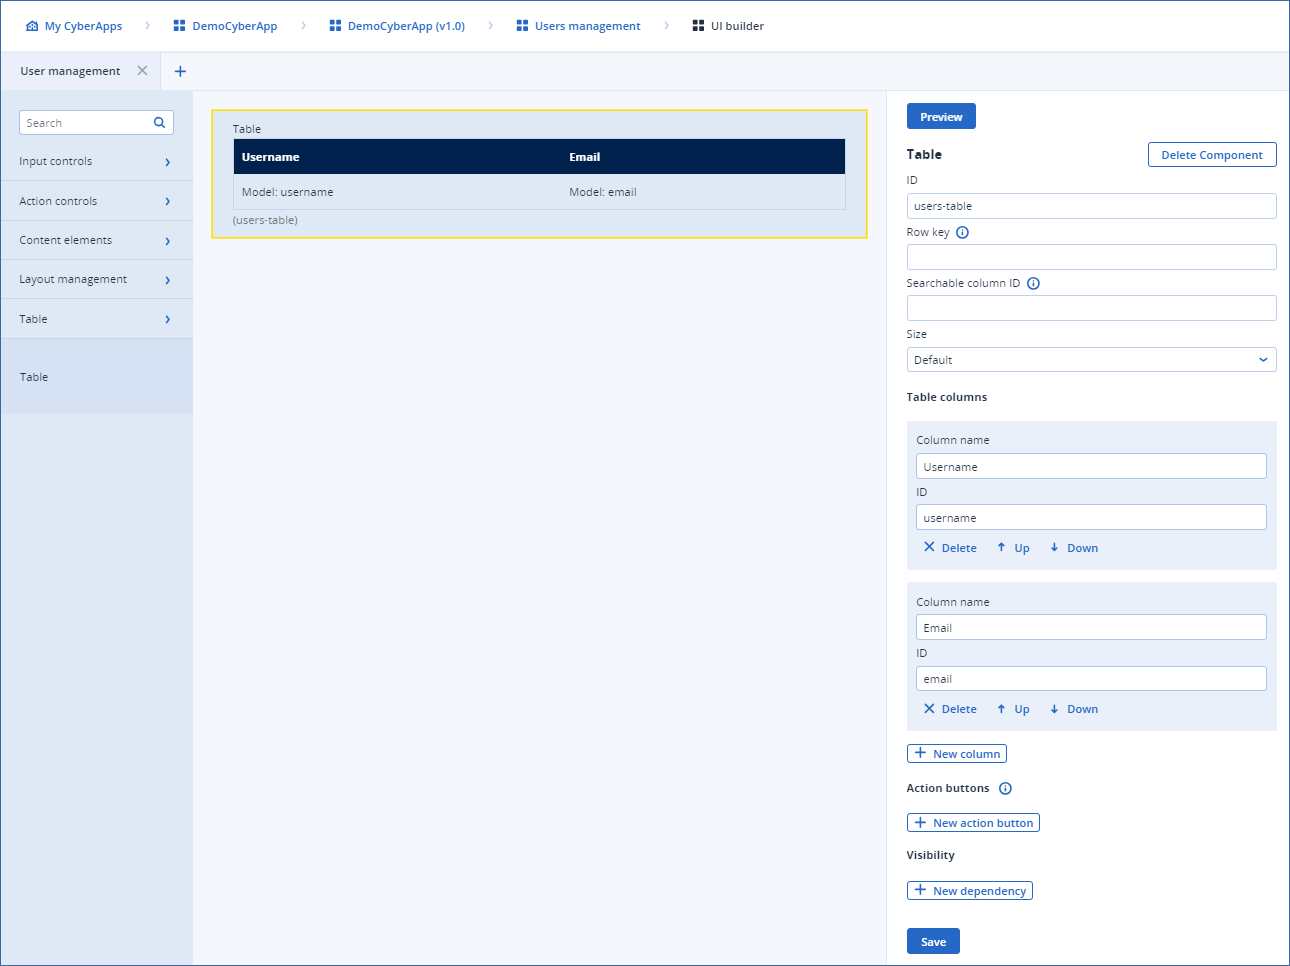
In the left pane, expand the Table section, and drag a Table element into the UI builder.
Select the Table element to edit the table attributes.
- Specify a unique alphanumeric ID for the table. For example,
users-table.Note
This will be used in the callback request/response mapping.
- Under Table columns, click New column.This will be the Username column.
Specify a name for the column. For example,
Username.Specify a unique alphanumeric ID for the column. For example,
username.Note
This will be used in the callback request/response mapping.
Click New column again to add another new column for the users’ emails.
Specify a name for the column. For example,
Email.Specify a unique alphanumeric ID for the column. For example,
email.Note
This will be used in the callback request/response mapping.
[Optional] Click Preview to preview the table.
Click Save.
To populate the table using data initializer callback
Create a callback called Read users.
For our purposes, consider the following callback example:
Callback name: Read users.
Callback request schema, which does not define any structure:
{}Callback response schema, which defines an object containing an array of objects with the
usernameandemailfields:{ "$schema": "http://json-schema.org/draft-04/schema", "type": "object", "properties": { "items": { "type": "array", "items": { "type": "object", "properties": { "username": { "type": "string" }, "email": { "type": "string" } } } } } }
Note
For more information, see Adding a callback.
Click anywhere in the empty area of the UI builder.
In the right pane:
Select your Read users callback in the Data initializer callback dropdown.
Click Configure response mapping.
Under Response mapping, click Add mapping entry.
- In the left-hand dropdown, select items (array).This is the field defined in the response schema of your callback.
- In the right-hand dropdown, select users-table (table).This is the ID your specified for the table, whose value will include the value received from the response.

With this configuration, the
itemsarray is explicitly mapped to the table while array items (table rows) are mapped to the table columns using corresponding domain property names: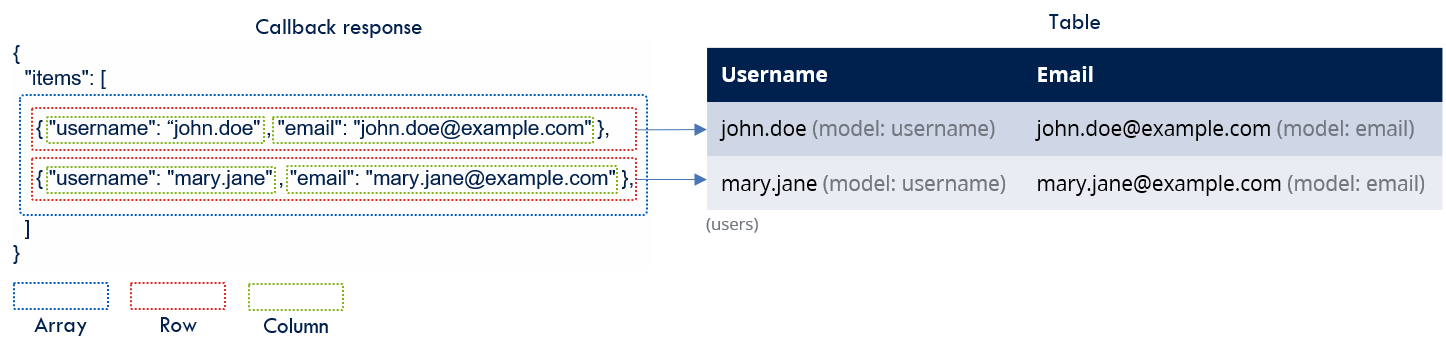
Click Save.
To attach a callback to the table action
Create a callback called User invite.
For our example, consider the following callback:
Callback name: User invite.
Callback request schema, which defines an object containing the
emailfield:{ "$schema": "http://json-schema.org/draft-04/schema", "type": "object", "properties": { "email": { "type": "string" } } }
Callback response schema, which does not define any structure:
{}
Note
For more information, see Adding a callback.
Select the Table element and in the right pane:
Under Action buttons, click New action button:
Enter a Label for the action button. For example, Re-invite user.
- Select the Availability from the dropdown. For example, If one row is selected.This is the condition under which the action button may be clicked.
Select Callback from the Action type dropdown.
Select User invite from the Callback Name dropdown.
Under Request mapping, click Add mapping entry.
In the left-hand dropdown, select users-table (table).
- In the right-hand dropdown, select email (string).This is the field defined in the request schema.
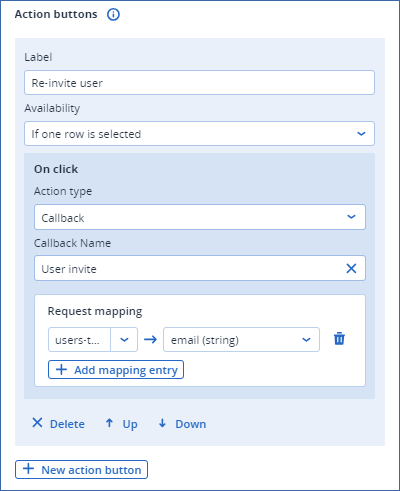
With this configuration, when one row is selected, the Re-invite user button will become active and will execute the User invite callback with the
emailof the selected row:
Note
If your action allows for multiple rows to be selected, the ID of the column must be mapped to an array of objects.This will result in the following correspondence between table row selection and the resulting payload: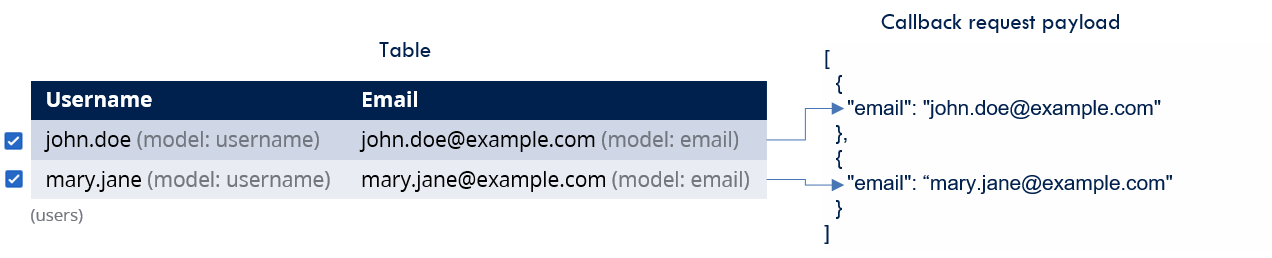
Click Save.