Building the demo CyberApp
Note
Step 1 - Creating the CyberApp
Create a CyberApp and name it SayHi.
Note
Do not turn on the Connection to Acronis API toggle switch, because SayHi does not need access to the Acronis API.
Step 2 - Adding the Acronis integration catalog details
Note
Create a Description and complete the minimum required fields for the Description to be valid. For the purposes of the demo, the content is unimportant, but here is what we used:
About CyberApp > Name: Say Hi!
About CyberApp > Logo:

About CyberApp > Catalog card description: Say “Hi!’ to the world!
About CyberApp > Detail page title: Say “Hi!’ to the world!
About CyberApp > Action button (website): www.demoisv.com
Support contant > Company name: DemoISV
Step 3 - Building the CyberApp functionality
Step 3a - Creating the CyberApp Version and extension point
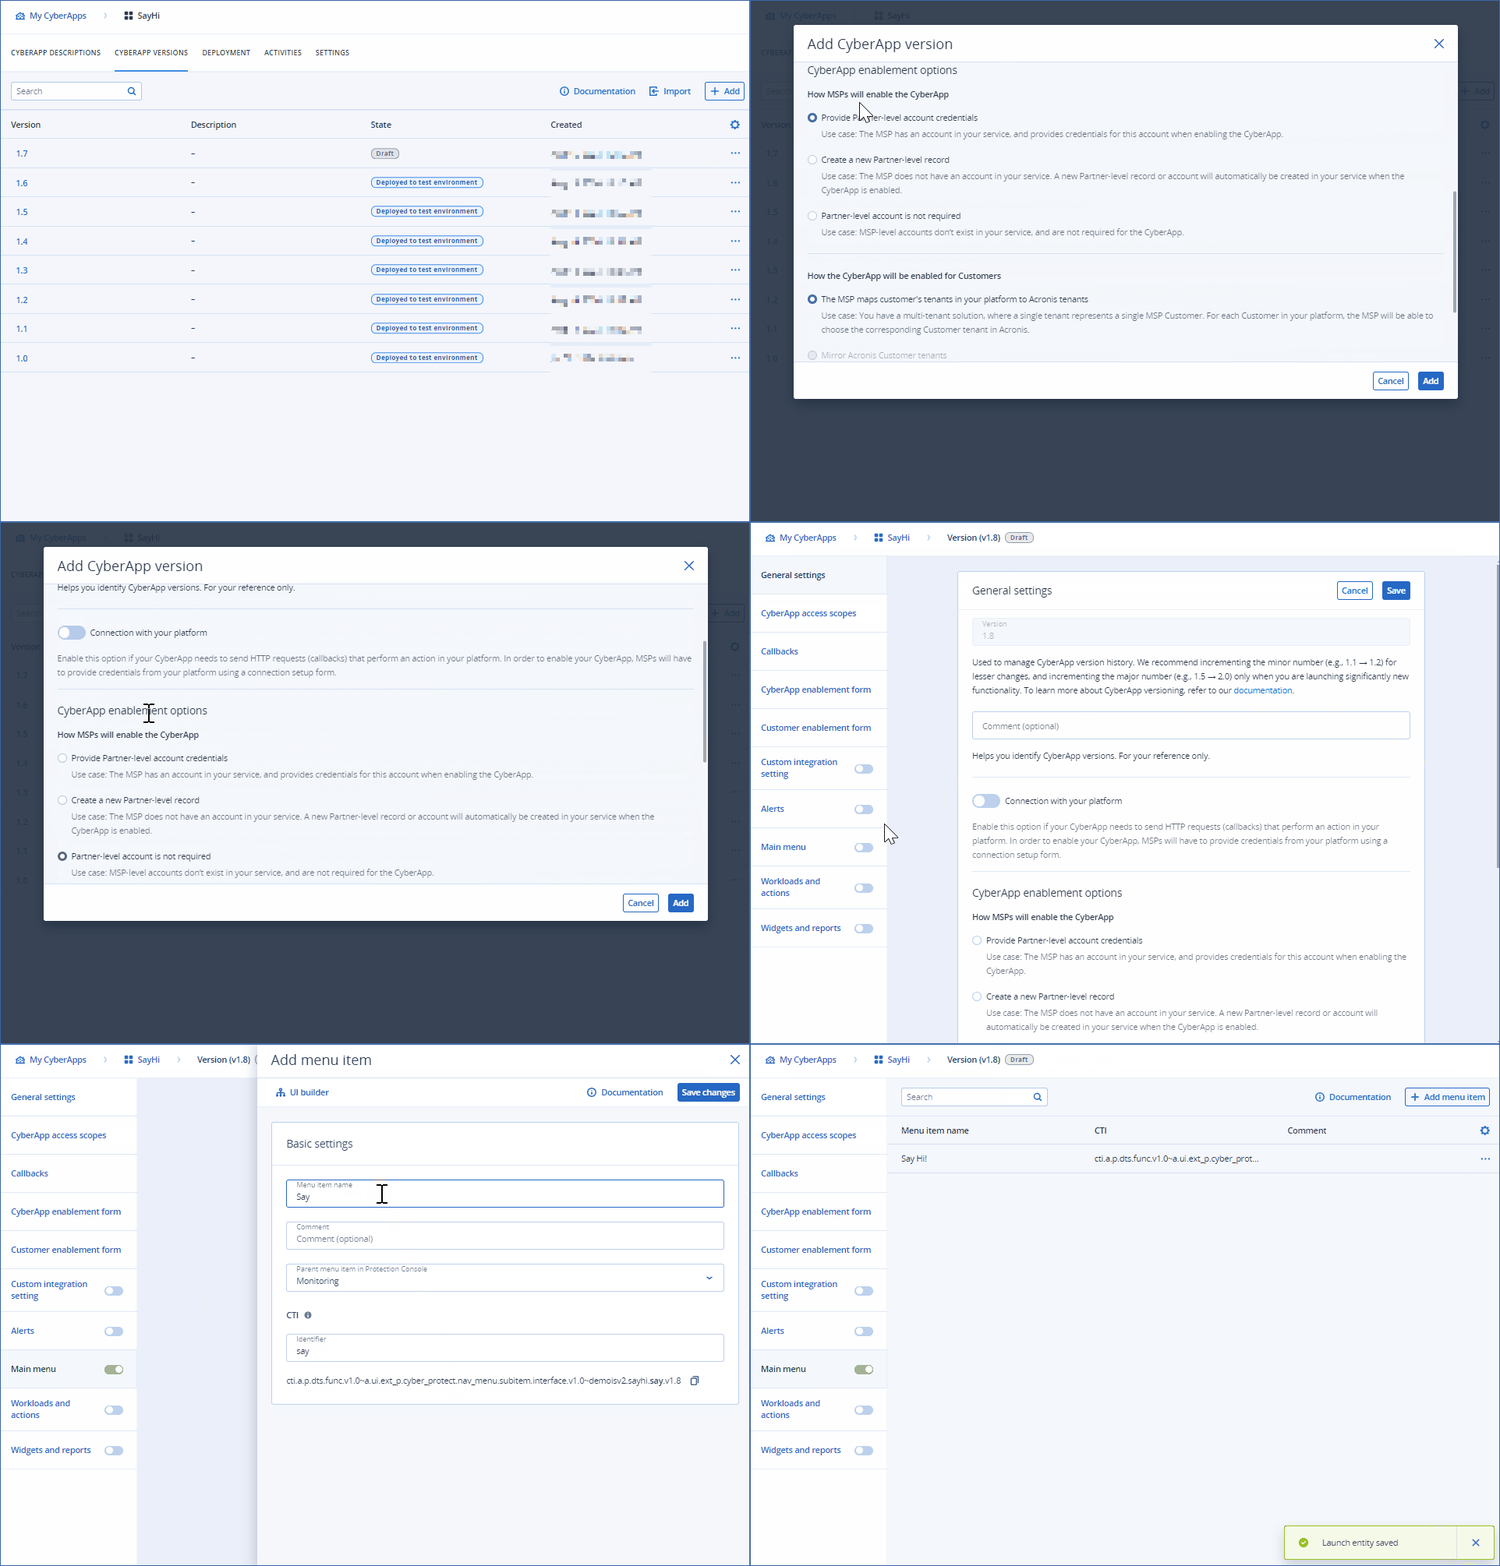
Create a Version with explicit partner and customer enablement options.
Note
Ensure that the Connection with your platform toggle switch is not turned on, because SayHi does not need access to your platform. If this toggle switch is enabled a CyberApp callback handler is expected.
- We named the menu item Say Hi!, and added it to the Acronis Cyber Platform Management menu by selecting Management from the Parent menu item in Protection Console dropdown.
Step 3b - Creating a form to display the selected greeting
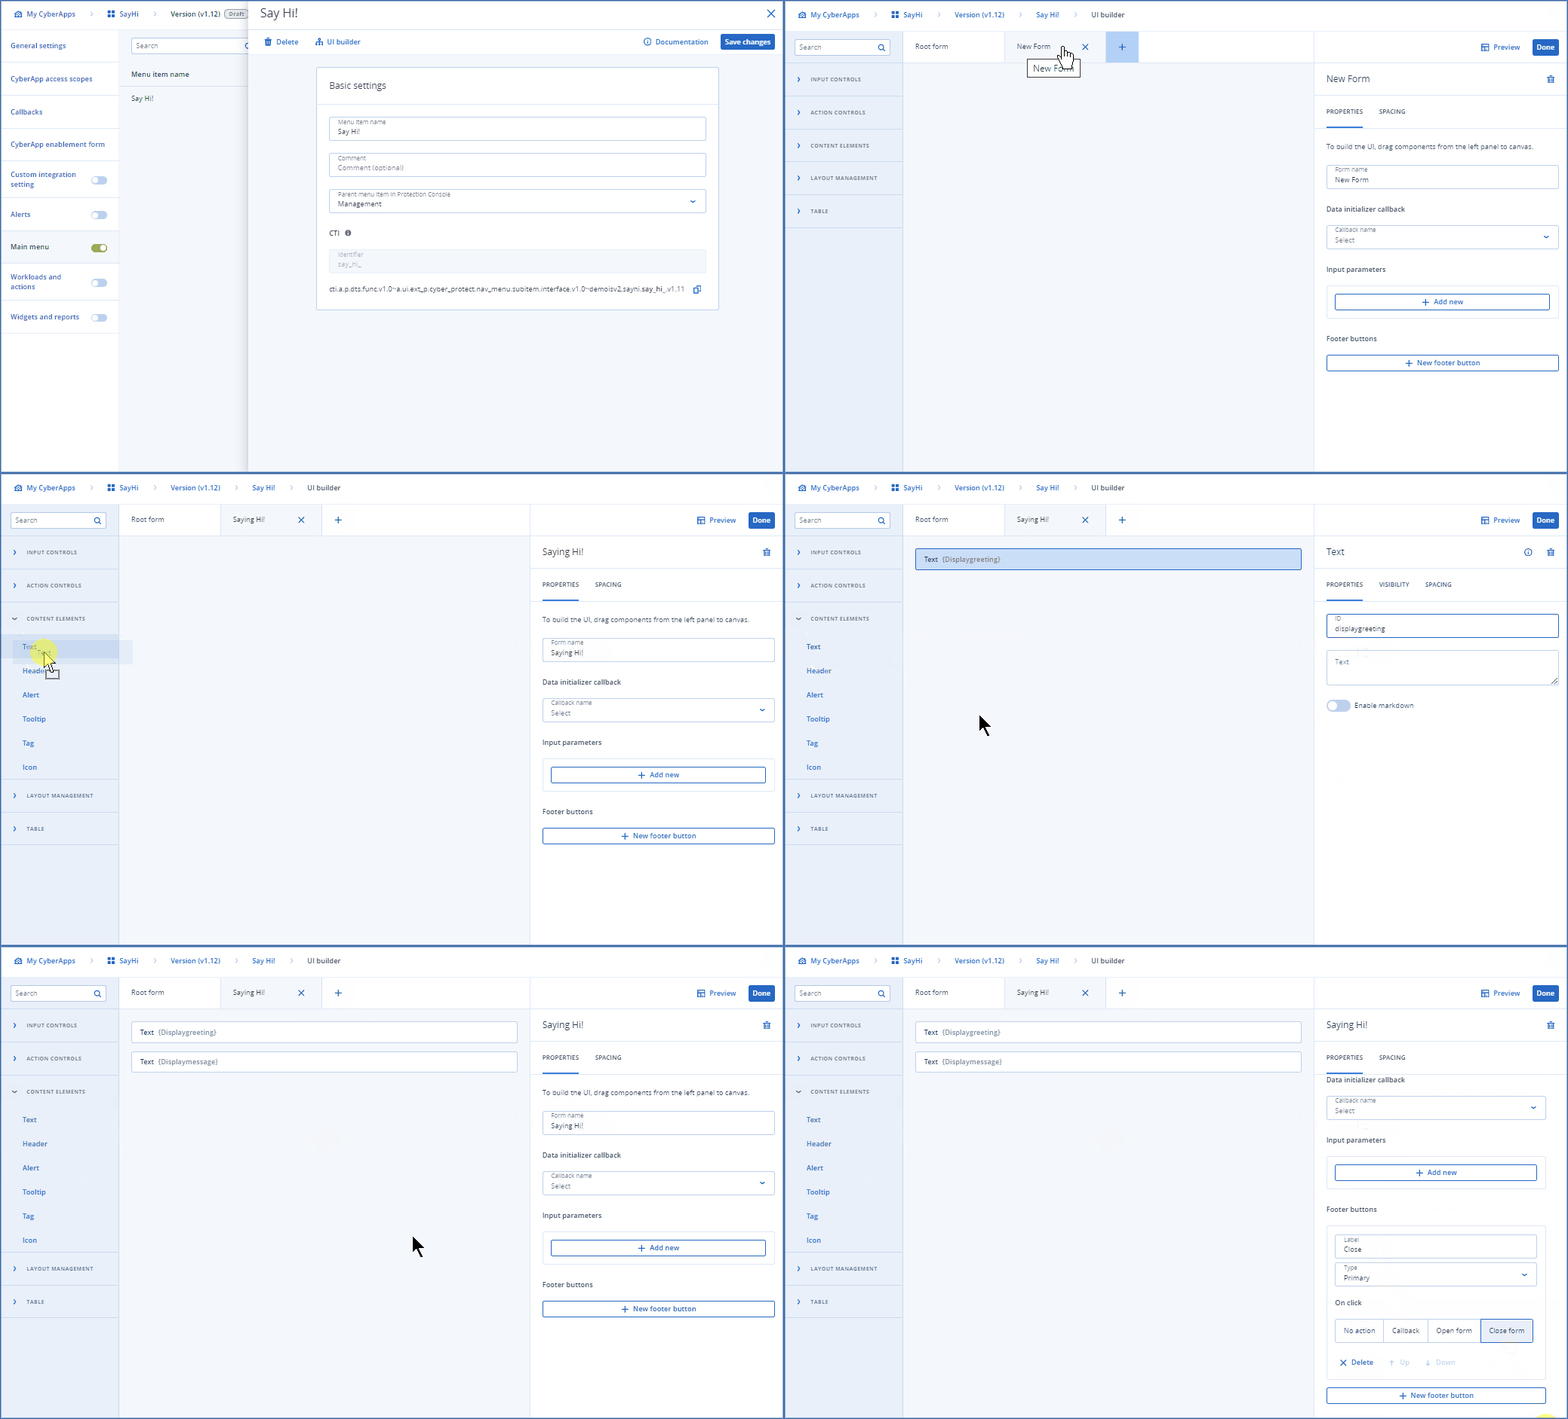
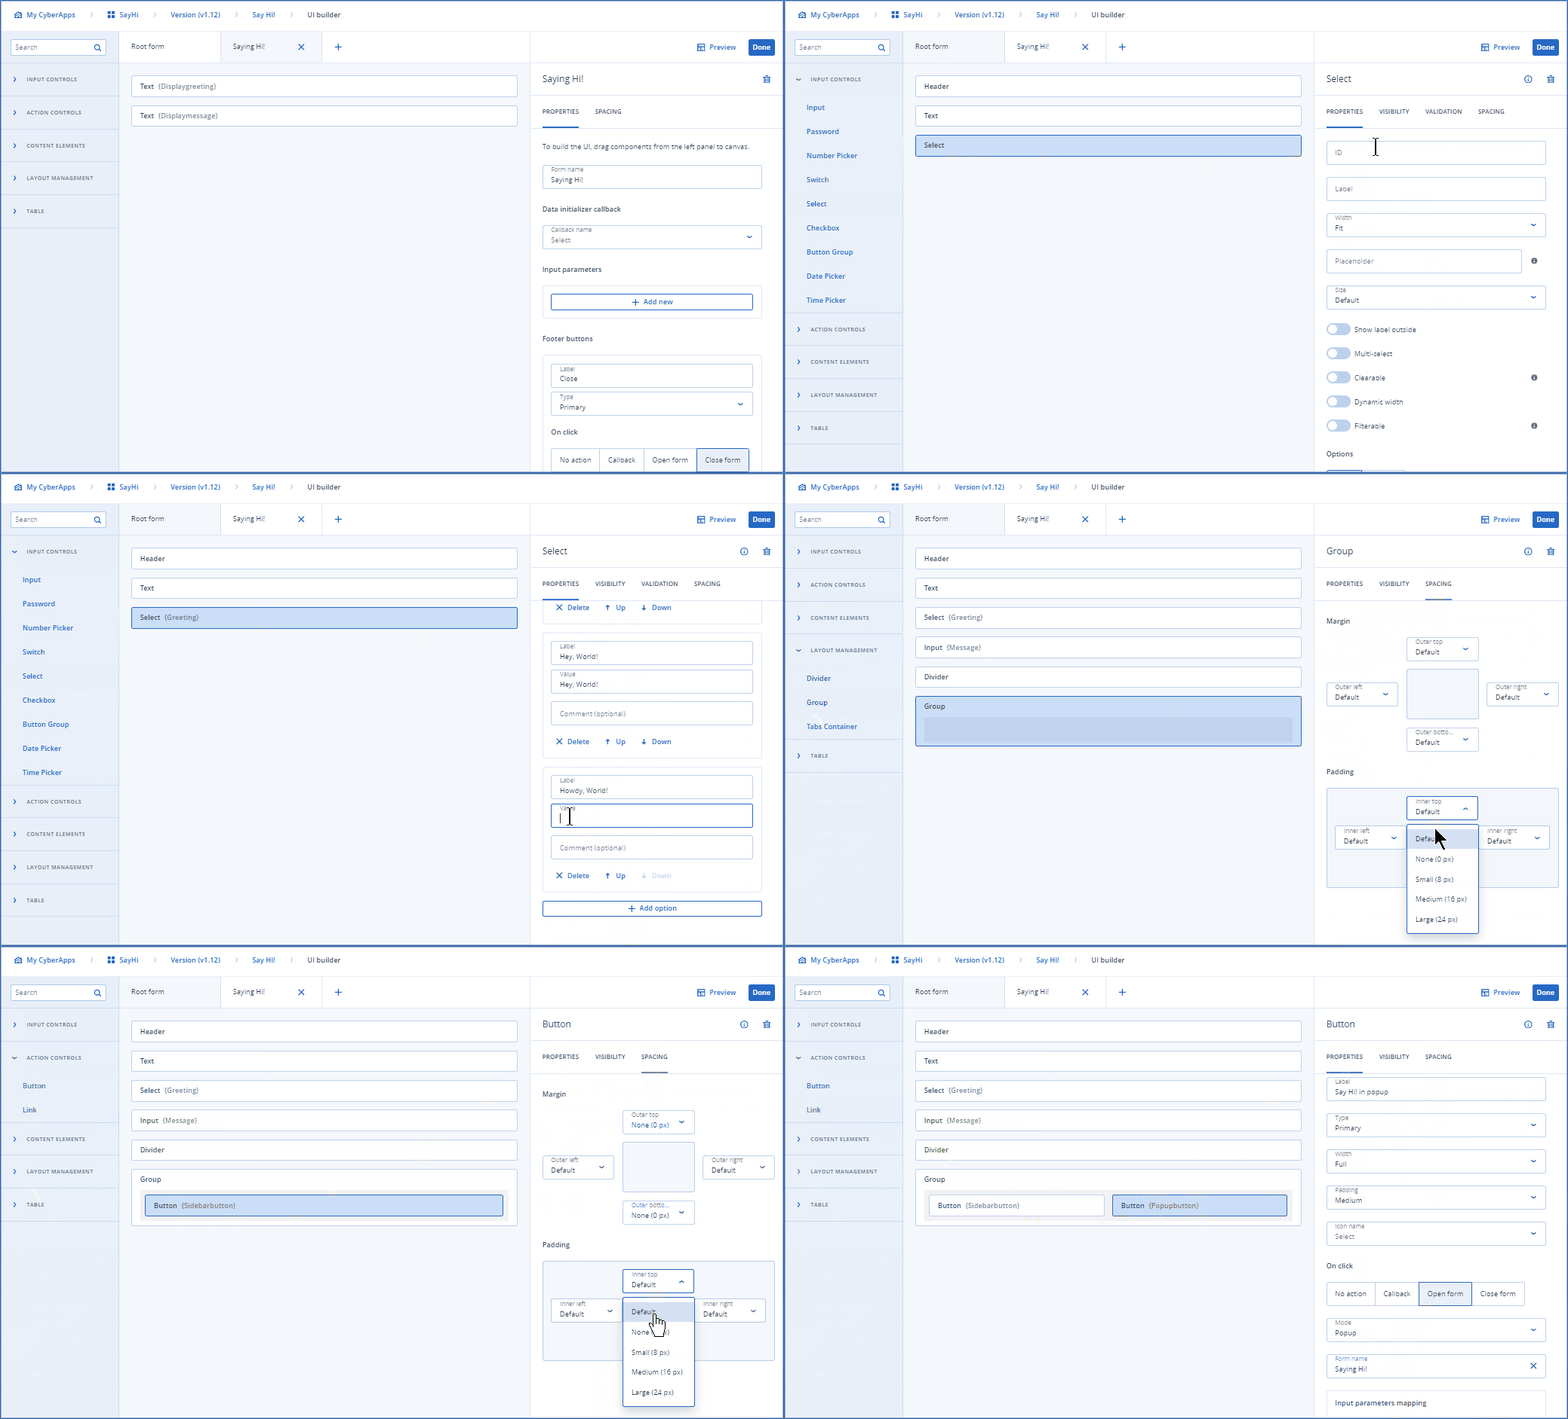
We will start by creating a dependent form, which will display the chosen greeting.
Click
 to design the SayHi UI.
Click
 in the Form group area, and name the new form Saying Hi!.
From the CONTENT ELEMENTS menu, drag and drop a Text element and set the ID field to displaygreeting.
Drag and drop another Text element and set the ID field to displaymessage.
Create a form footer button to close the form.
Click on an empty space on the form and scroll down to the Footer buttons section of the PROPERTIES tab.
Set the label to Close.
Assign the On click property to Close form.
Step 3c - Designing the greeting selection form
Select the Root form.
From the CONTENT ELEMENTS menu, drag and drop a Header element onto the form and change the Text field to “Instructions”.
From the CONTENT ELEMENTS menu, drag and drop a Text element below the header element and change the Text field to “Choose a greeting, then click a Say Hi! button”.
From the INPUT CONTROLS menu, drag and drop a Select element below the existing form elements.
Set both the ID and Label fields to “Greeting”.
Set Width to Fill.
Set Placeholder to “Choose a greeting”.
Add Options to the select element. Set the Label and Value fields the same for all of them. We added four:
“Hello, World!”
“Hi, World!”
“Hey, World!”
“Howdy, World!”
From the INPUT CONTROLS enu, drag and drop an Input element under the Greeting select element.
Set the ID to “message”.
Set the Label to “Additional message”.
Set the Width to Fill.
Set the Type to Textarea.
From the LAYOUT MANAGEMENT menu, drag and drop a Divider element below the existing form elements.
From the LAYOUT MANAGEMENT menu, drag and drop a Group element below the divider.
Set Mode to Row.
Set Gap size to Medium.
Select the SPACING folder, and set the Inner top and Inner bottom settings to Small.
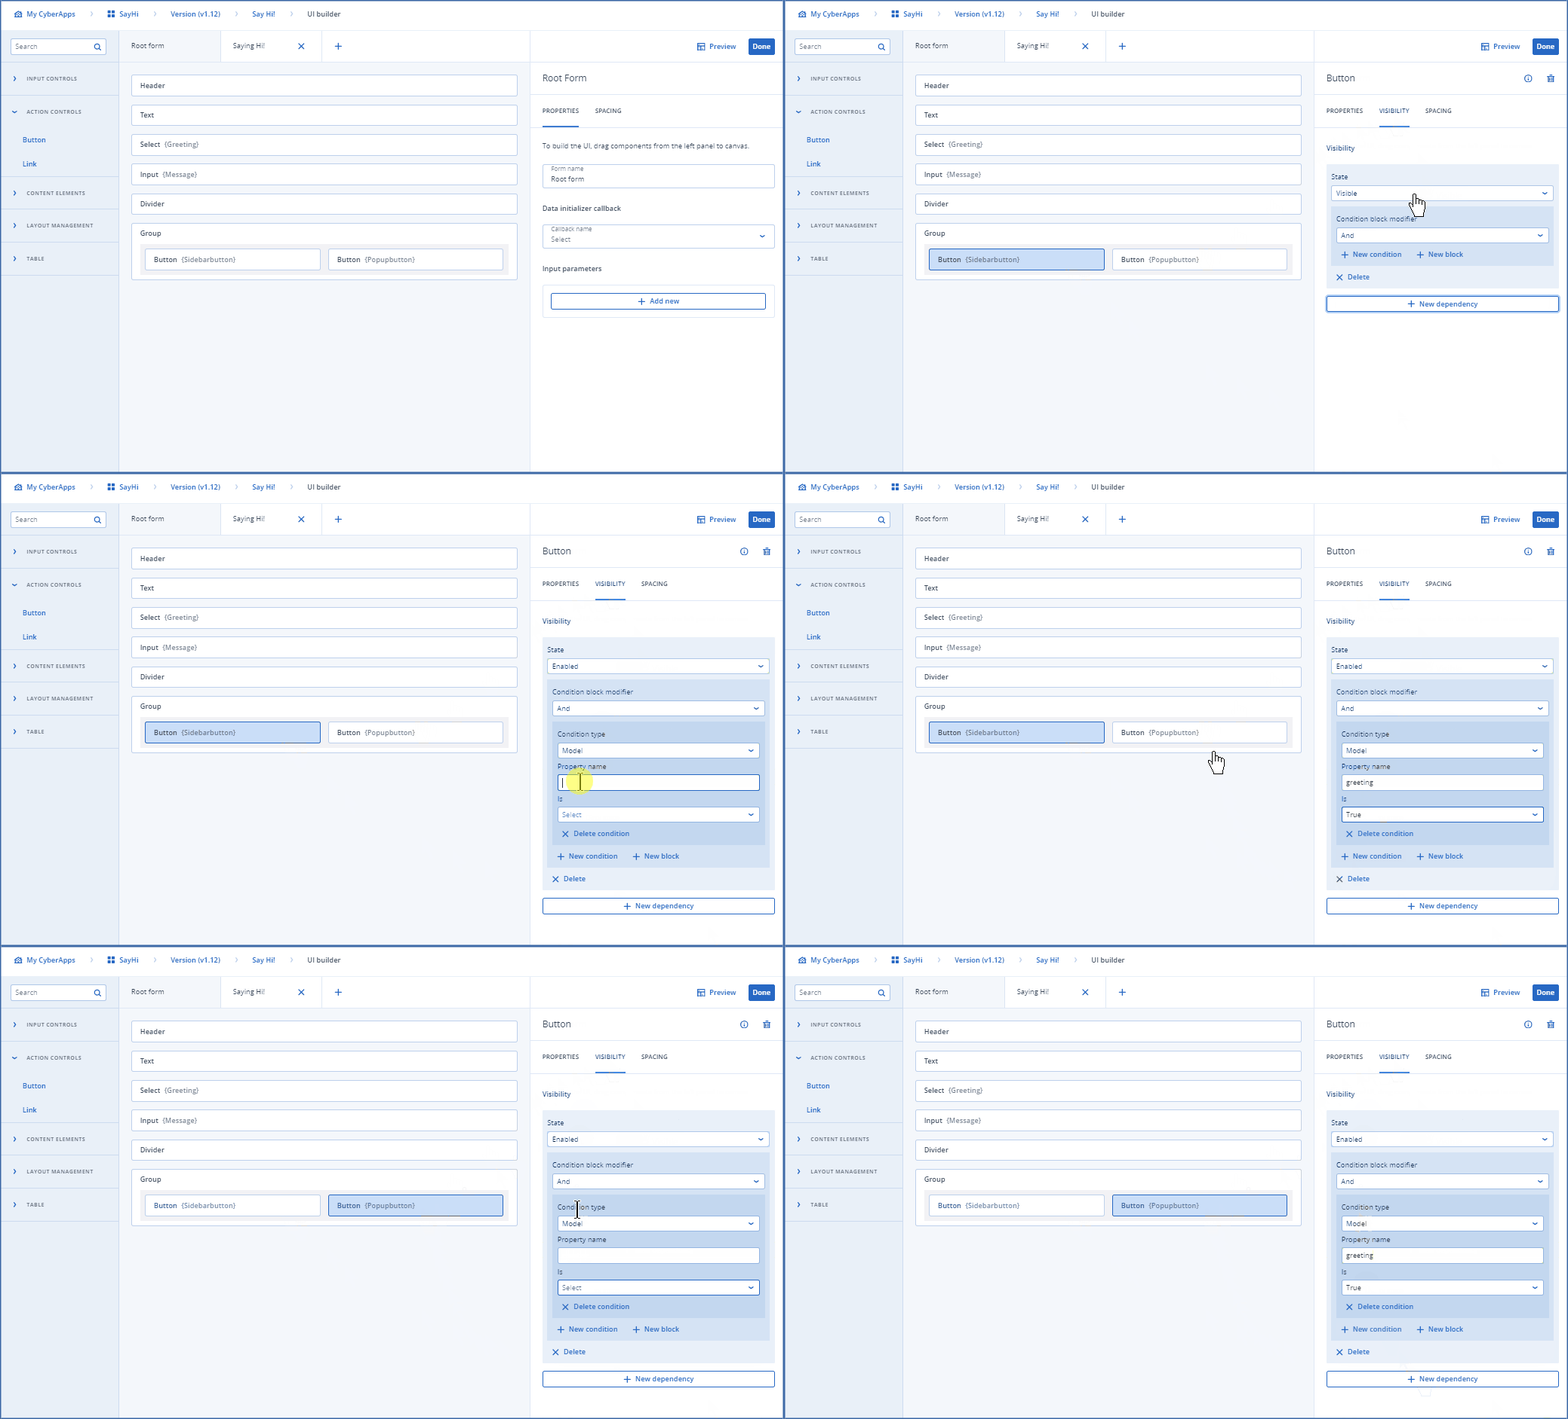
From the ACTION CONTROLS menu, drag and drop a Button element into the grop element.
Set ID to “sidebarbutton”.
Set Label to “Say Hi! in sidebar”.
Set Width to Fill.
Set On click to Open form, Mode to Sidebar, and Form name to Saying Hi!.
Click on SPACING, and set Outer top, Outer bottom, Inner top, and Inner bottom all to None.
From the ACTION CONTROLS menu, drag and drop a Button element into the grop element.
Set ID to “popupbutton”.
Set Label to “Say Hi! in popup”.
Set Width to Fill.
Set On click to Open form, Mode to Popup, and Form name to Saying Hi!.
Click on SPACING, and set Outer top, Outer bottom, Inner top, and Inner bottom all to None.
Step 3e - Mapping the greeting data to the greeting display form
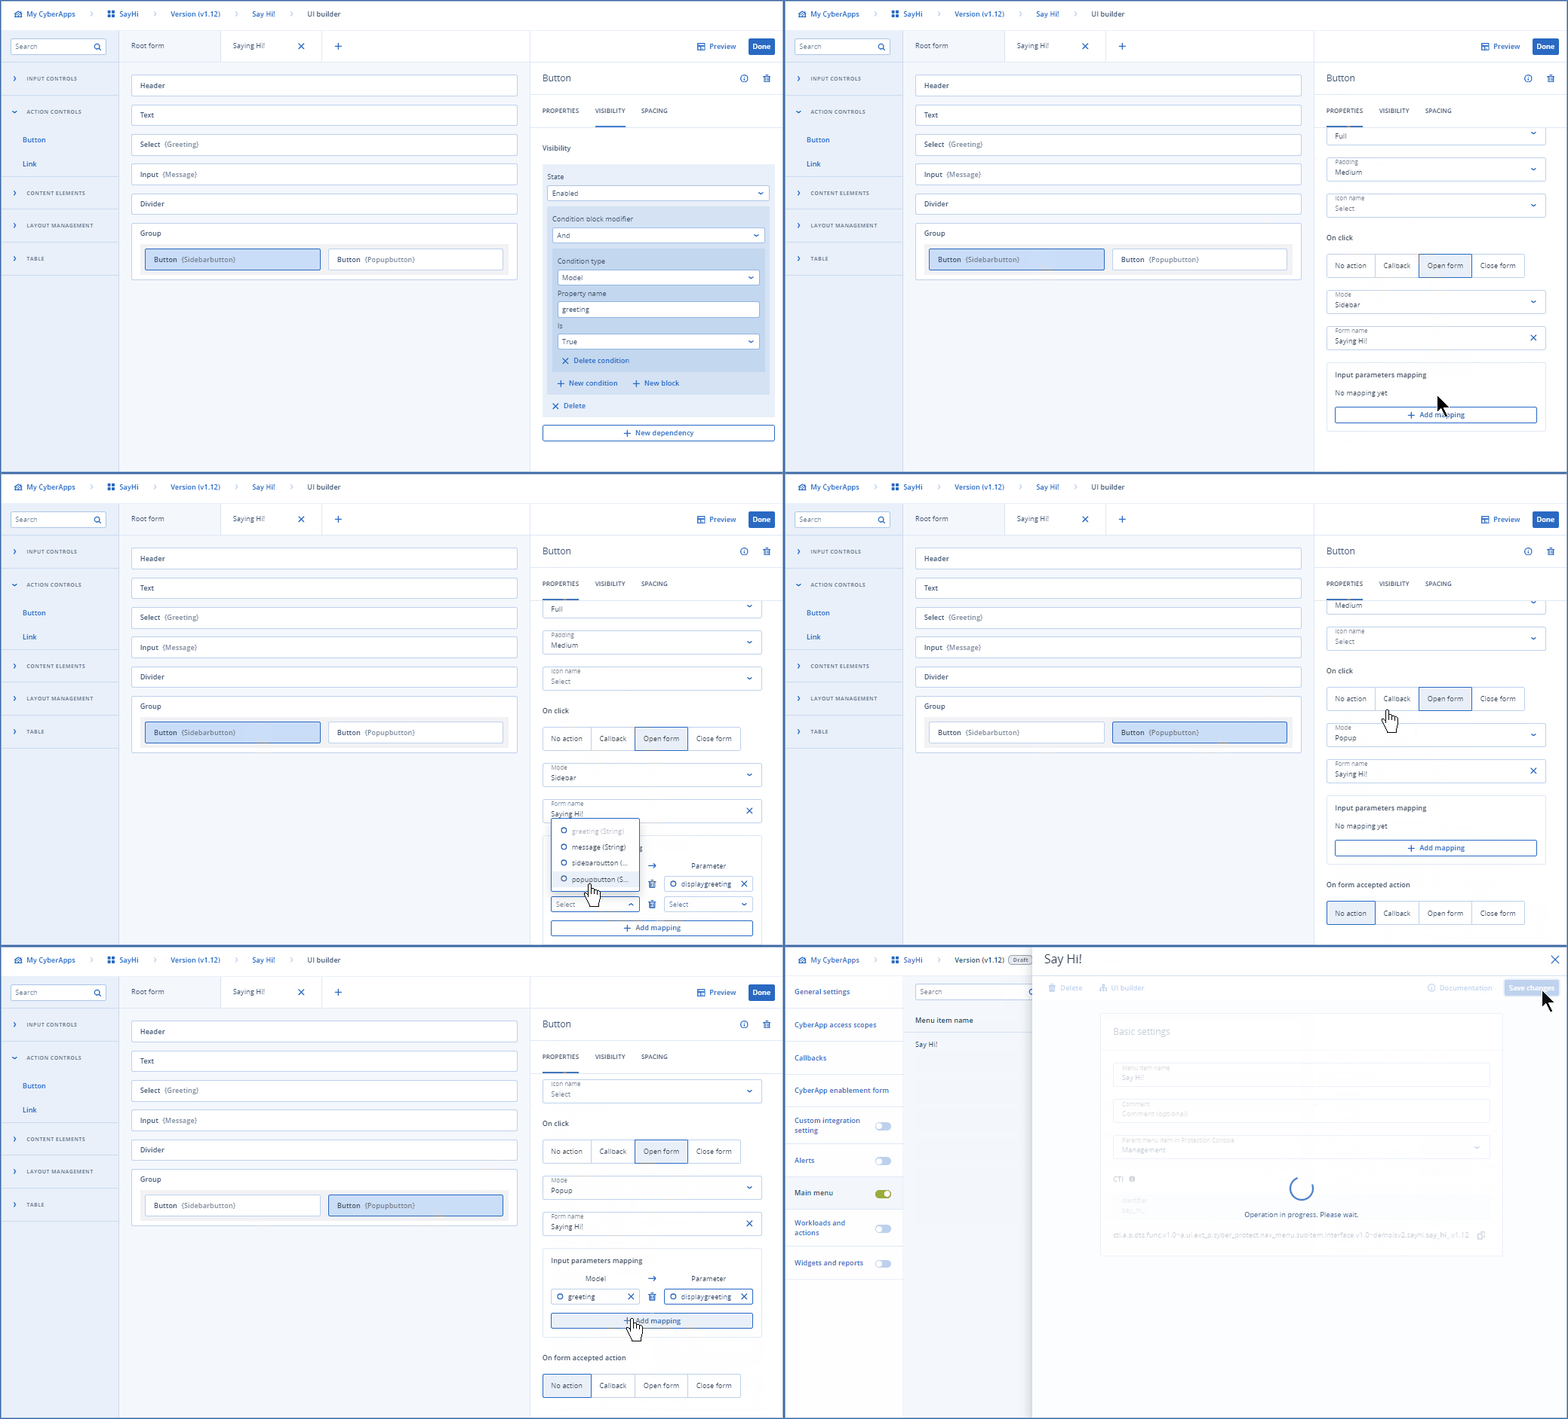
We need to open the dependent form we just created, and map the chosen greeting from the Root form dropdown to the displaygreeting text element on the dependent form.
Select sidebarbutton.
Select the PROPERTIES tab.
In the On click > Input parameters mapping section:
Click Add mapping.
Select greeting from the Model dropdown, and select displaygreeting from the Parameter dropdown.
Click Add mapping.
Select message from the Model dropdown, and select displaymessage from the Parameter dropdown.
Repeat the above steps for popupbutton.
Click Done.
Click Save changes.
Step 4 - Deploying the CyberApp
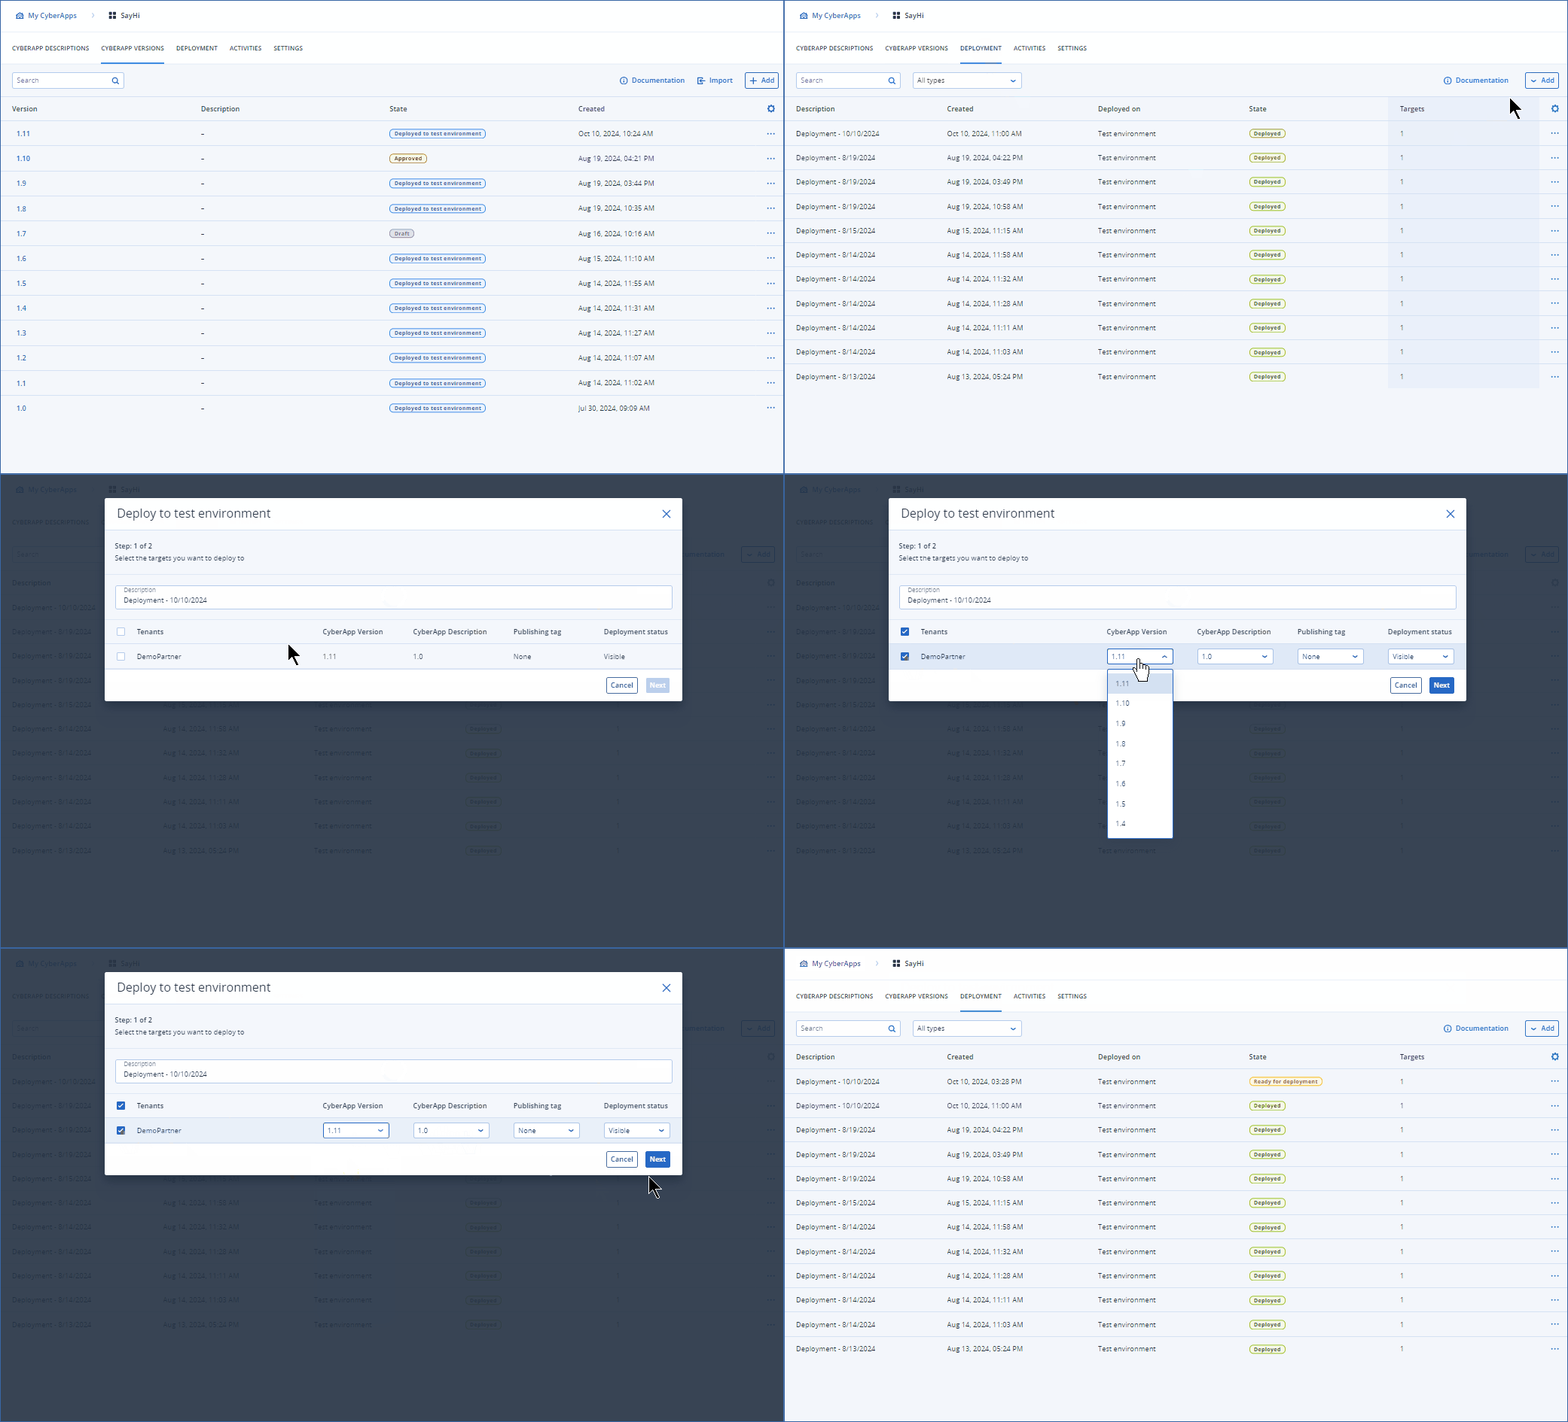
Deploy the Description and Version you just created to your test environment.
Step 5 - Testing the CyberApp
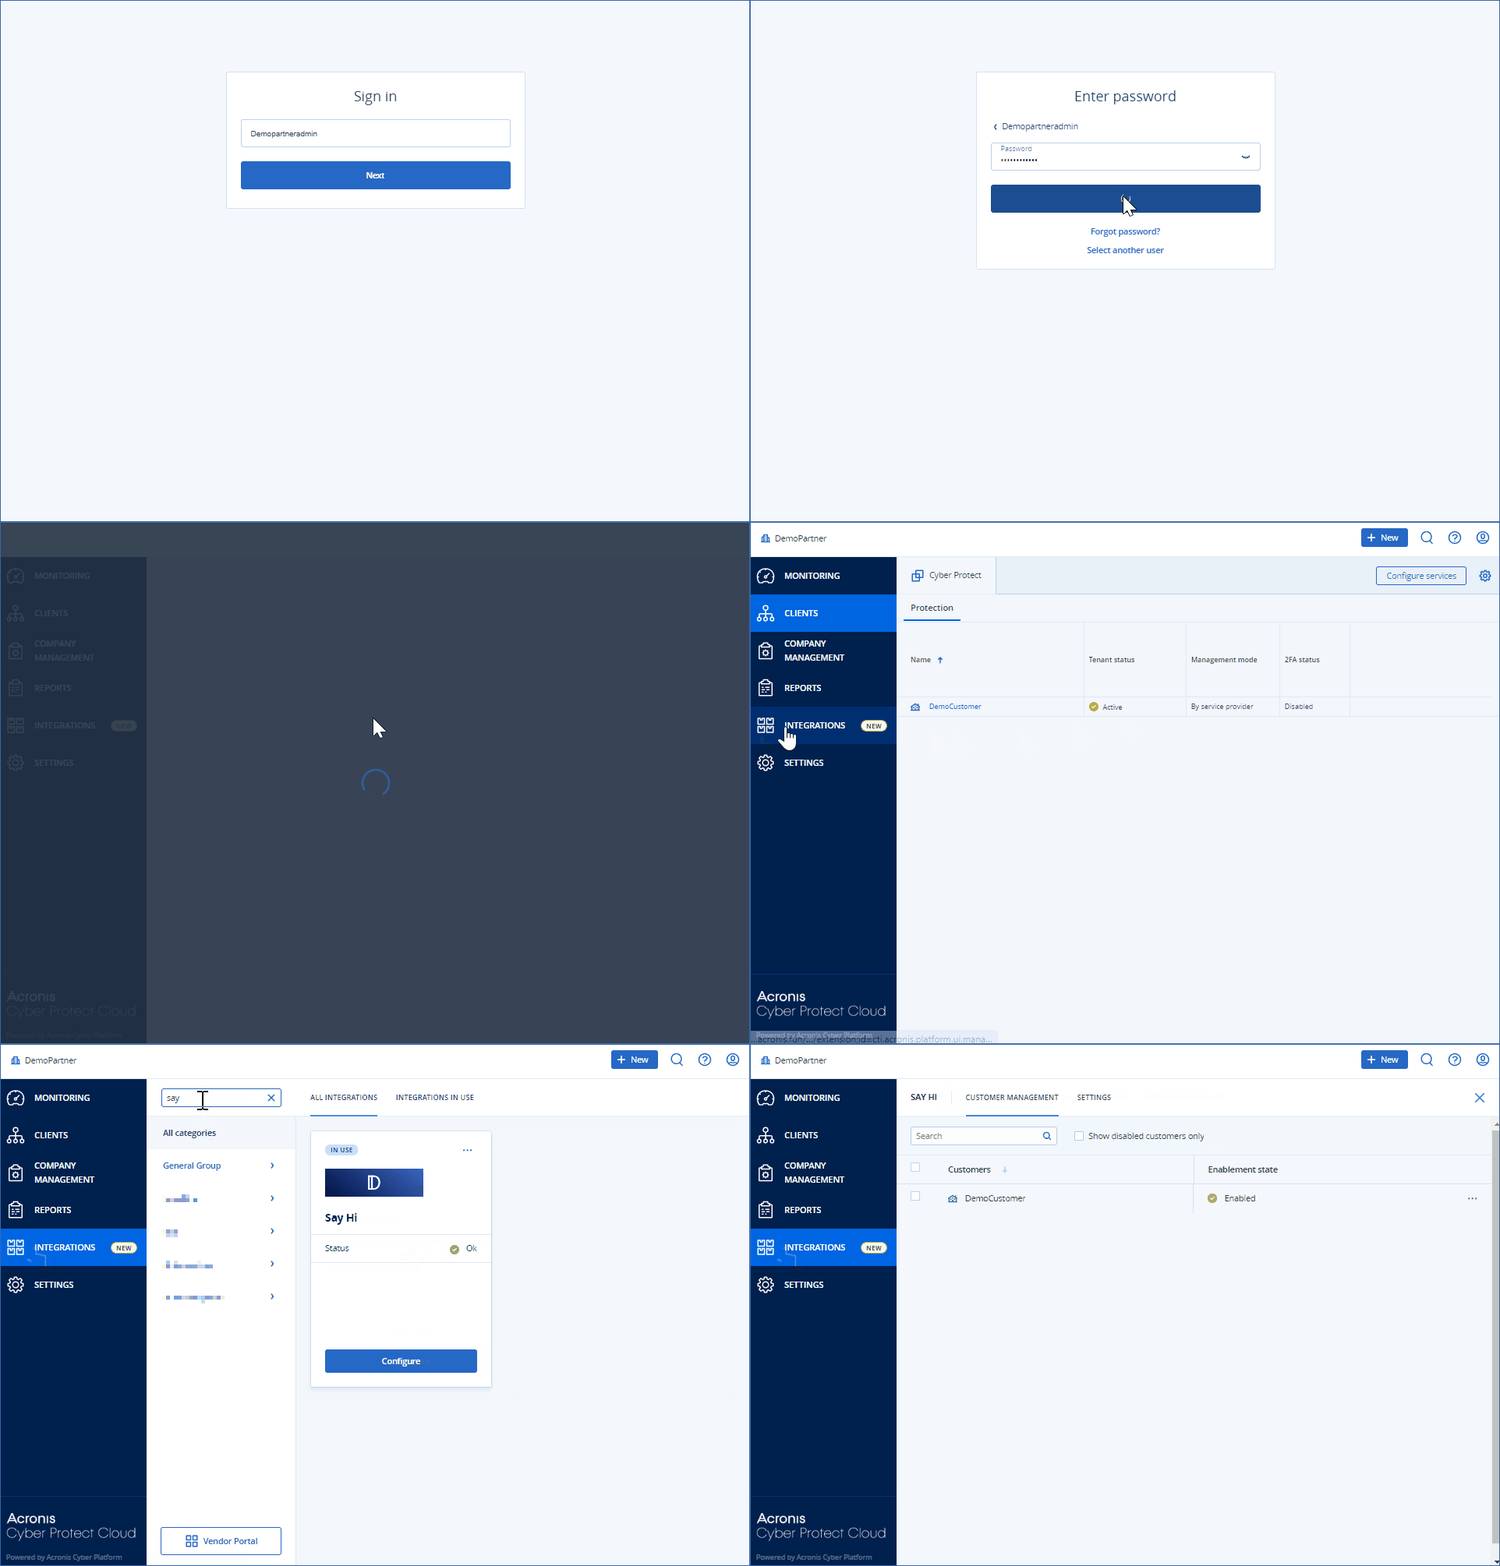
Log in to Acronis as an administrator on the tenant through which you published the CyberApp.
Select INTEGRATIONS from the menu.
Find the SayHi CyberApp in the catalog.
Click Configure.
SayHi is now enabled. The menu item has been added to the Management menu. Click it to use the CyberApp.
