Adding a callback
Note
To add a callback
-

Click
 .
.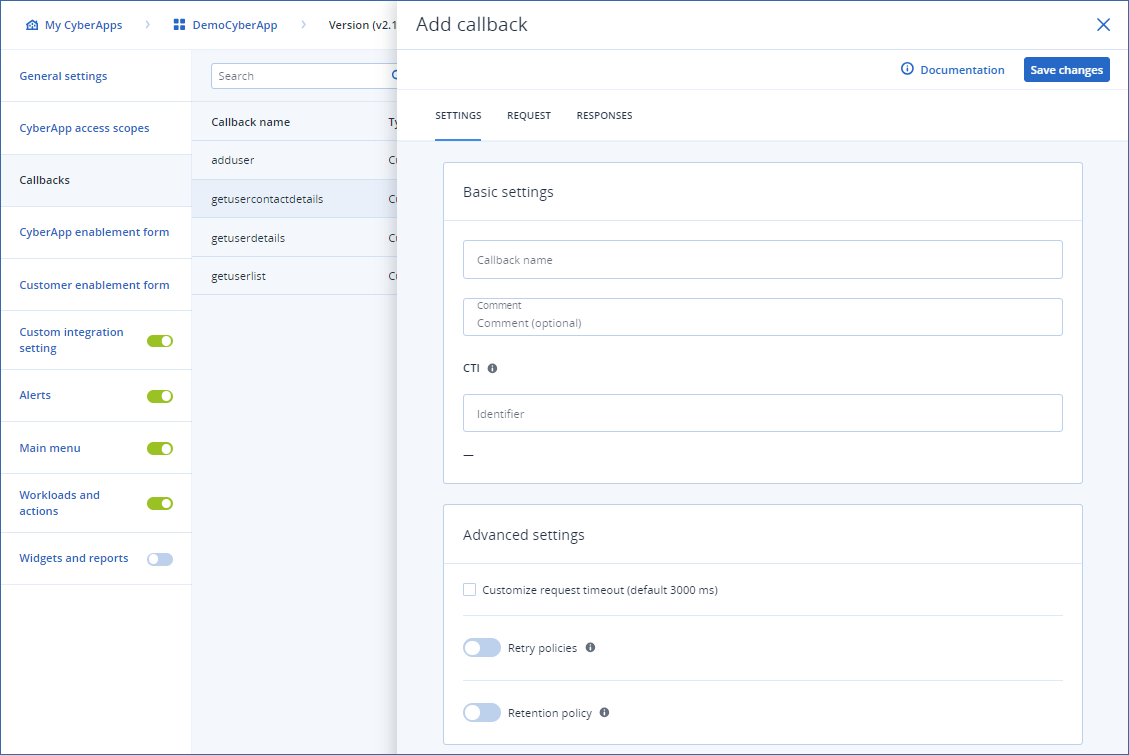
Enter a Callback name.
[Optional] Enter a Comment for the callback.
- Specify a unique Identifier.You will need the CTI to use in the callback handler.
[Optional] Modify the default Advanced settings.
[Optional] Select the Customize request timeout checkbox and set the amount of time that Acronis Cyber Platform will wait for a response.
[Optional] Turn on the Retry policies toggle switch and specify your preferred failed request retry settings.
Note
When only Retry interval is specified, fixed interval retries are performed.When Retry interval and Delta are specified, the wait time between the retries could be calculated by the following formula: Retry interval + (count - 1) * Delta.When Retry interval, Delta and Maximum interval are specified, an Exponential backoff algorithm is applied. Wait time between the retries can be calculated by the following formula: Retry interval + (2^count - 1) * random(Delta * 0.8, Delta * 1.2).If calculated value exceeds Maximum interval, the time to the next interval will be calculated as: Maximum interval + random(Delta * -0.2, Delta * 0.2). Random delay helps prevent a synchronized wave of retries from multiple clients, also known as the thundering herd problem.[Optional - and only available if you turn on Retry policies] Turn on the Fast first retry toggle switch.
[Optional] Turn on the Retention policy toggle switch and specify how long successful messages and failed messages should be retained for.
[Optional] Select the Customize maximum number of messages per tenant checkbox and set the maximum.
- [Optional] Select the Pagination from the dropdown.
Note
This field is not available if your CyberApp Version is a v1.0 type. To specify custom callback pagination, you should migrate to Version v2.0 by clicking the migration banner.
The selected pagination method determines how Acronis requests paged data from your service, and how your callback handler should return subsequent pages.
- NoneThe callback response returns all items in a single response, and no pagination parameters are expected.
- Cursor-basedYour service supports cursor pagination.In this approach, the response includes a cursor token for the next page, and a limit to represent pages.
- Offset-basedYour service supports offset pagination.In this approach, the request and response use an offset, and a limit to represent pages.
Callbacks with cursor-based or offset-based pagination are used to populate Table elements and Select elements in the UI Builder.
Note
The exact request and response payload properties depend on the callback request type and the backend implementation.
[If required] Add the request payload.
[If required] Add the response payloads.
Click Save changes.