CyberApp OIDC SSO authentication
Authentication with SSO (single sign-on) follows OpenID Connect 1.0 (OIDC1) and uses its Authorization Code Flow with optional PKCE extension.
CyberApps must use the API client credentials issued for the single sign-on flow to generate an authorization URL, request an access token, specify the received access token in the
Authorization header according to Bearer authentication scheme, check the information about the authenticated user.CyberApp SSO authentication flow (with PKCE extension)

Controlling access
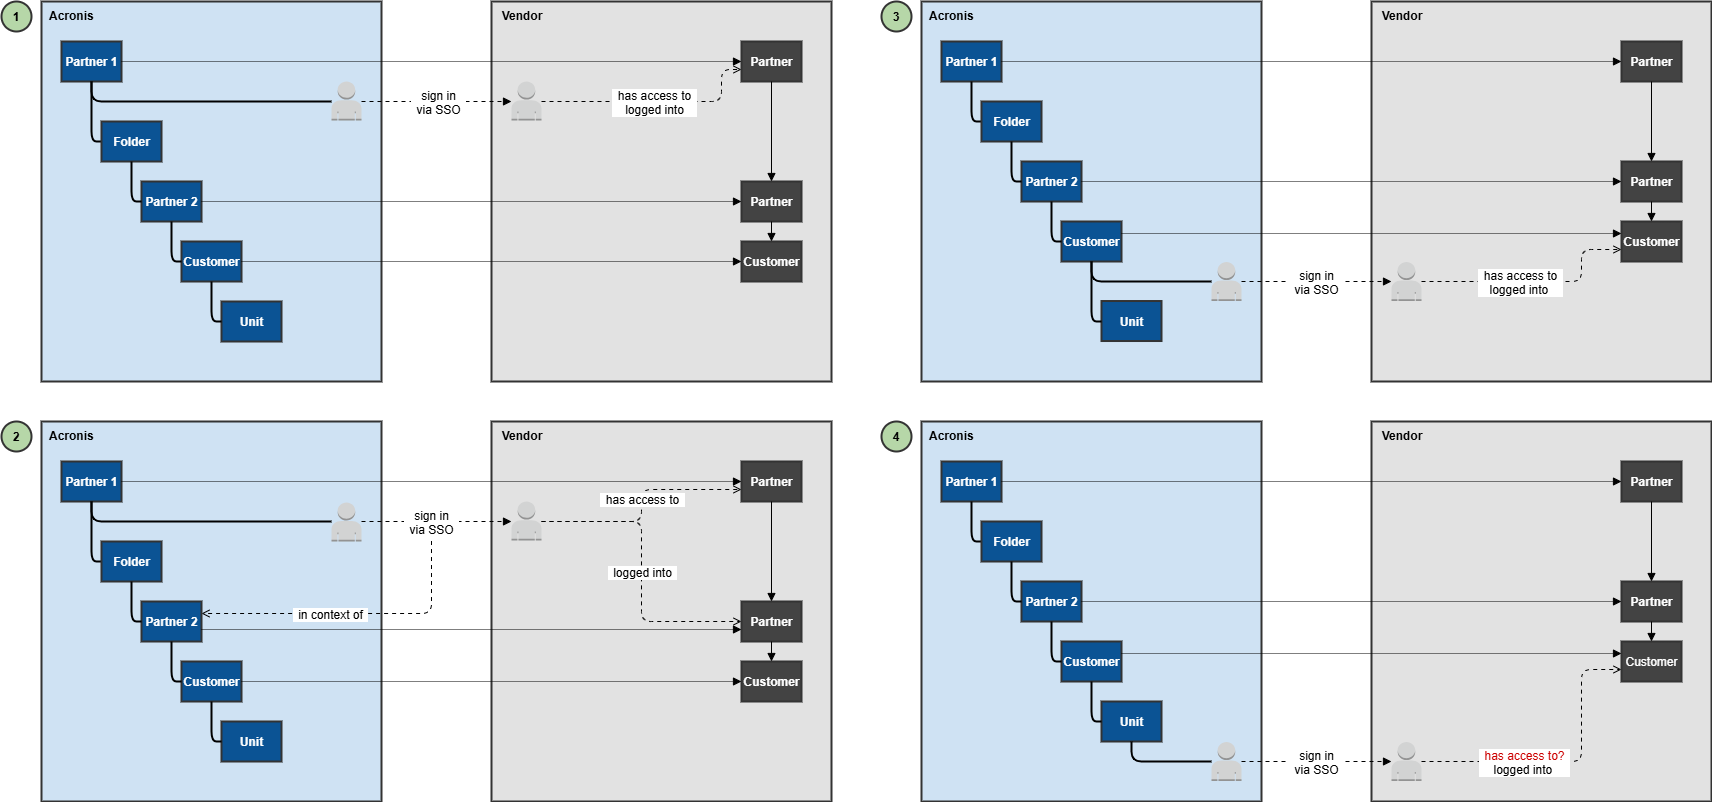
The following diagram demonstrates which tenants can be accessed by the user authenticated with SSO flow if the CyberApp is enabled for Partner 1, Partner 2, and Customer and they are mapped to corresponding tenants on the Vendor side.
To authorize the user, you must:
- Know the tenant that owns the user logged in via SSO by checking the
tenantsclaim (first tenant in the list).You authorize (or create) the identity based on this tenant on your side and apply “is owned to” and “has access to” relation. - Know the roles that the user has by checking the
rolesclaim.You identify the permissions and authorize the identity based on the role mapping. - Know the login context by checking the query parameter provided in the URL that was used to initiate SSO login.This allows you to drill down the logged-in user into a given tenant context.
Know tenancy hierarchy by checking the
tenantsclaim (other tenants in the list).Allow or disallow users from Unit level to log in to your platform on the Customer level.
In this section