Adding a menu item
Note
To add a menu item
[If required] Click Enable to enable the extension point.
Click
 .
.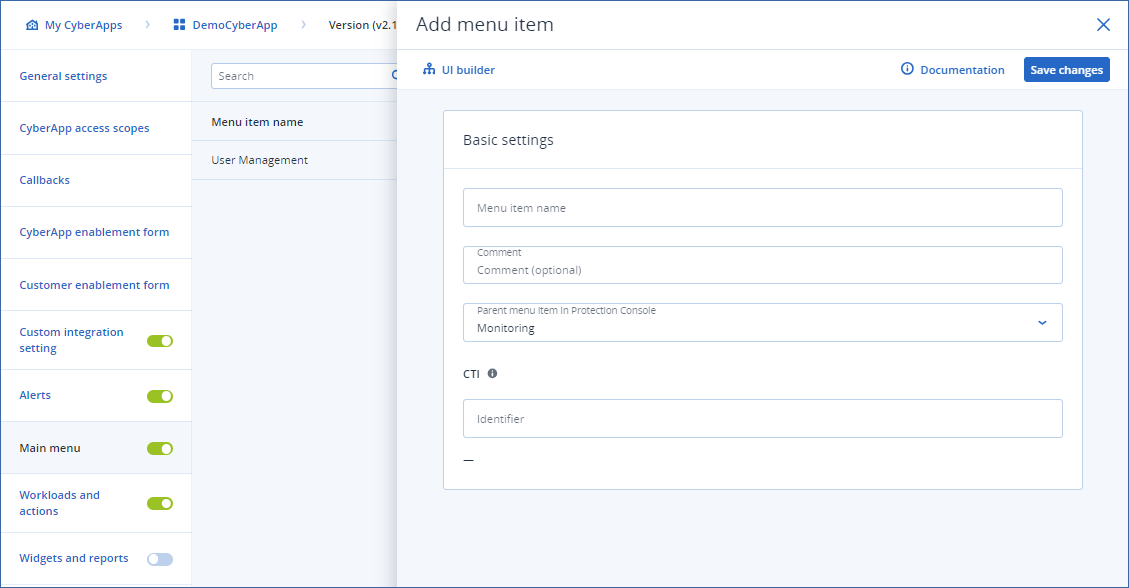
Enter a Menu item name.
Note
This is the label of the menu item added under the Acronis Cyber Protect Cloud main menu item.
[Optional] Enter a Comment.
Note
This is for your reference only.
Specify a unique Identifier for the menu item.
Note
For more information on CTI codes, see CTI.
In the Location dropdown, select the Acronis Cyber Protect Cloud main menu item to which you want to add the new menu item.
Select a Display options radio button to specify which type of Acronis tenant users will see the new menu item.
Partner-level only
Customer-level only
Both
[Optional] Click
 to start creating the menu item form group and click Done when you have finished. For more information, see UI builder
Click Save changes.