Building the example
In this section, you will see how to:
Create the User management menu item.
Create a table on the form and populate it using a data initializer callback which requests a list of users from your callback handler.
Create a table action button and attach a callback to it, which will pass your callback handler a user email to use to trigger the ISV cloud service to re-invite an existing user.
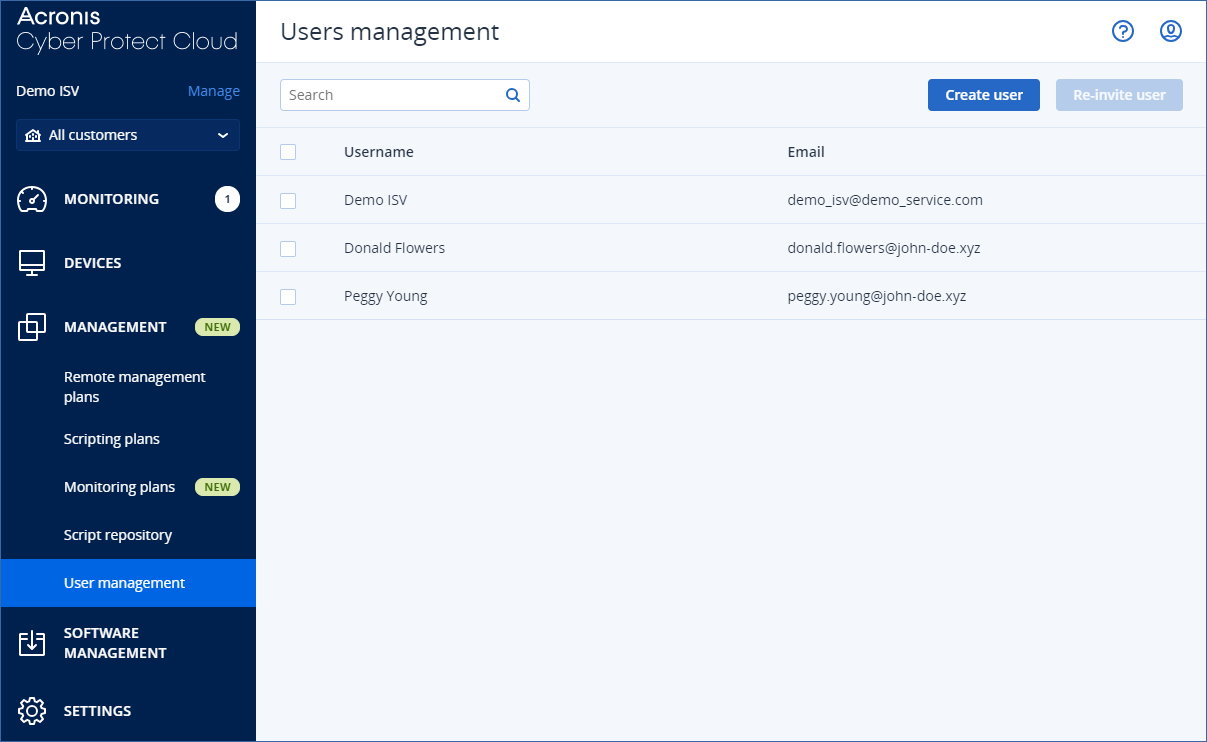
Create the menu item UI
Click UI builder to start building the menu item UI form.
In the element menu, expand the TABLE section and drag a Table element onto the UI builder canvas.
Specify an ID for the table. For example,
userlist.Under Table columns, click New column to add the user name column.
Specify a Column name and enter ID of
username.Click New column again to add the user email column.
Specify a Column name and enter ID of
email.[Optional] Click Preview to preview the table, then click outside the preview to close it.
Populate the table using a data initializer callback
Select the root form by clicking an empty space on the UI builder canvas.
In the configuration pane select the GetUsers callback from the Data initializer callback dropdown.
In Response mapping, click Add mapping.
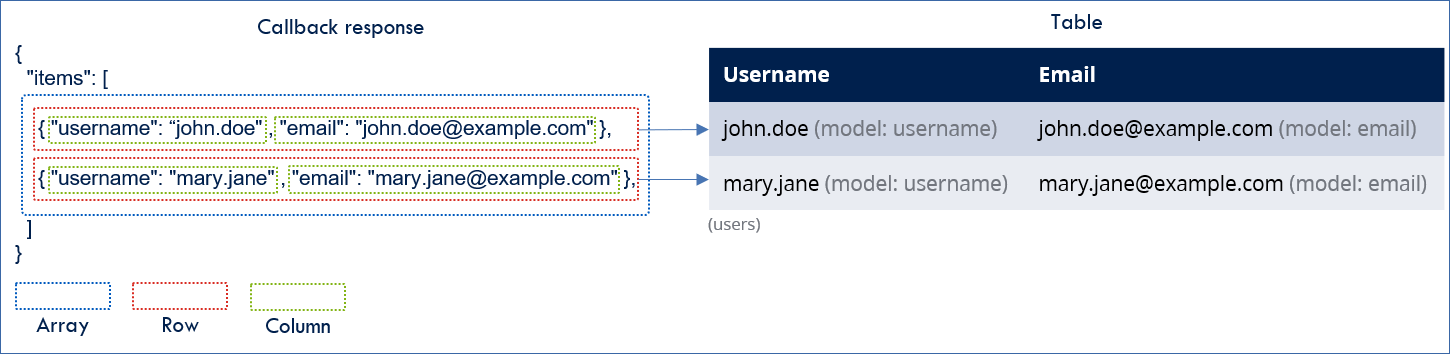
- In the Callback dropdown, select items (Array of objects).This is the field defined in the response schema of the getusers callback.
- In the Model dropdown, select userlist (Array of objects).This is the ID of the table, which is an array in the form model.
With this configuration, the items array is explicitly mapped to the table while array items (table rows) are mapped to the table columns using corresponding domain property names:
Create the table action button
Select the Table element.
In the configuration pane, under Action buttons, click New action button:
Enter a Label for the action button. For example, Re-invite user.
- Select If one row is selected from the Availability dropdown.This is the condition for the action button to enable.
Select Callback from the On click section.
Select InviteUser from the Callback Name dropdown.
Under Request mapping in the Model dropdown, select email.
- In the Callback dropdown, select email (string).This is the field defined in the request schema.
With this configuration, when one row is selected, the Re-invite user button enables. When clicked, it will execute the InviteUser callback with the email of the selected row:

Note

Save the work
Click Done.
Click Save changes.